Sunday, 28 November 2010

Evaluation

Communication Technology 2 Evaluation

My main aim for Communication Technology 2 (Comm. Tech 2) was to become more confident in using the recourses available in college and Adobe Photoshop/ Illustrator whilst expanding my illustration skills in the process. I initially wanted to portray this through animation as I find it really interesting but have only touched upon it in the past. However, the college ordered new animation software and it did not come in time and I was told that there was no point in showing me the old software when it is already outdated. I was devastated, but decided to try out loads of new skills instead of focusing on just one.

Looking back, I realise it took me a while to get started on this brief. I think this was because I could not pursue animation so therefore I did not know what to do, other than draw. This was just about acceptable because one of my aims was to draw more, but I knew I had to (and wanted to) expand further. Nevertheless, as a result of this I am drawing more everyday: if I am watching television or a film it does not feel right if I am not drawing at the same time. I have learnt that these short moments in a day soon fill up a sketchbook and I feel my drawing skills have developed because of this. Now my next aim is to draw more without reference. Also I have learnt that when I get briefs in the future, I just need to get started. I spend too much time worrying about what I am going to do when I need to just get on and do it.

Furthermore, I have become more confident about my work and seem to be developing a style. I was very self- conscious about my drawings and felt my sketchbook too private to show. I think this is because I was too precious about my drawings. I soon realised I am a perfectionist: one tiny A5 illustration can take me a long time to finish. I now experiment more, and not as afraid to make mistakes and try out new techniques- this is the best way to learn, to discover something new. I have become aware that paying attention to detail and spending time tweaking the image is what I enjoy doing, and that it has become a part of my style. Learning how to use the laser cutter and finding out how to “live trace” an image really suited my silhouette illustrations, making them look sharper and generally more professional. I think this was the turning point to my own opinion of my work. I want to keep up the drawing, carry on exploring and see if I can make my style more distinctive.

Screen-printing was another learning curve. It was something I did not know much about so I decided to give it a try. At first the lengthy screen preparation process put me off, it was very tedious waiting for it to dry. This was where time management came in- I found I could go and prepare the image for exposure or get on with something else all together. I learnt that making the most of these small time slots in your day add up very quickly. When I started printing however, it surprised me how quick it was. It made me nervous though because one stupid mistake, such as forgetting to put the weights on, and the entire print is ruined (as I found out the hard way). It has taught me to be patient and thorough; rushing into things is how you make mistakes.

In addition, through screen- printing, I experimented with the size and the position of my images. The prints on the pillowcases were the original size of the hand drawn illustration, but when I printed onto the jumpers I enlarged the image in Adobe Photoshop and positioned it so the tree looked like it was growing onto the jumper from the side. I normally work really small but enjoyed exploring this aspect and would have liked to try more, but that meant stripping new screens, which would have been both time consuming and expensive. I am defiantly going to experiment with this in more detail in the future. From a tiny drawing in my sketchbook to a huge adaptation on a jumper, screen- printing really made me realise what is available in college and allowed me to expand my illustration skills. I was proud of the finished product as after 5 solid days in the print room, I felt I had worked hard to get there.

Determined not to abandon animation completely, via a group critique with Christian and Matt, I found out that you could create an animated gif on Adobe Photoshop, so gave it a try. Much to my surprise, I found the whole process really straightforward- if I had known this I defiantly would have used it more in the past. I taught myself the process by borrowing books from the library and watching tutorials online, discovering that this is my strongest way of learning. I am an independent learner. Other people distract me easily; so strangely, sitting on my own in my room means I work better than working in the actual Visual Communication studio. It also meant I could work at my own pace, go back and re- read something if I did not understand it and taking notes as I go along. I am self-disciplined so I know I will get on with my work (I begin to feel guilty). I should defiantly work like this more often in the future. A downside is that if I do get stuck I will have to go into college to ask for help. From Comm. Tech 2 however, I have become more confident in doing this (a confidence which has grown from using the laser cutter as I had to keep asking for new materials etc).

Incidentally, this brief has aided my confidence in using a blog and computers in general. Last year I really struggled with blogging as I had never used one before and did not really use a computer for my work. Small things, like uploading and aligning pictures with text, used to seem really tricky and I would become frustrated. Now I can achieve this successfully and find myself blogging everyday and will carry on with it in the future. This shows that the best way to become better at something is to practice, and keep practicing until you are satisfied. Also, I find that after I have completed an illustration on paper, I am scanning it in experimenting with it further in Photoshop and Illustrator. The best thing about this is that I can do whatever I want and the actual picture itself will not be harmed. This has also helped me to be less precious with my drawings as well as become more familiar with the Adobe software.

Now I feel more confident using computers, blogging and my work in general, I would now like to try and design my own web page. Although I have only tried web design one, and found it really difficult, I believe it would be a professional way to present my work. Due to Comm. Tech 2 I have learnt where to ask for help when I need it, and I actually feel I have gained the confidence to do this. Subsequently, I want to start undertaking live briefs and competitions. This will allow me apply the skills I have learnt and continue to build in confidence. I do not necessarily have to event submit the work once it is finished, but at least it would be something to pop into a portfolio.

Overall, Communication Technology 2 has proved to be a useful brief. While at times it could be time consuming and tedious to the point where I almost give up, I have learnt a lot about myself: from the way I work, to my style of illustration. I also now know where I need to improve my skills and build more confidence (although this has grown hugely and, I feel, made my work stronger). Comm. Tech 2 has helped me to develop a strong base and starting point to allow me to do this. I have learnt that, strange as it may sound, I like working hard. I produce better work when I have loads to get on with and it is more rewarding when all the work is finished.

Friday, 26 November 2010

Coming to an end...

To summarise, carrying out the Comm. Tech 2 brief was a mixed bag, but the outcome was extremely positive. It was, to say the least: exciting, enjoyable, time- consuming, stressful, very very useful and it allowed me to experiment- something I was not to great at before.

I know I'm a perfectionist and like paying attention to detail meaning I am a slow worker. But I always almost have to finish a project. Even if it means staying up all night. I like the challenge of having loads on my plate and love the feeling of relief and liberation once it is over. I feel I have earned time to relax.

Although during this brief I did not get the opportunity to learn as much about animation as I would have liked, I am still going to peruse the interest in the future. I did not however stop me from learning other, new skills. Before this brief my main issue was confidence. I feel it has grown immensely, but now would like to apply this and tackle some live briefs and competitions. I have learnt to enjoy my work and not to stress about things too much as often this makes thing go wrong.

Friday, 19 November 2010

Laser Cutter 2


After cutting trees from paper I wanted to try a material which was more adventurous. This tree cut out of 3mm acrylic has branches which are very delicate and are snapping off. I've learnt that when drawing out a shape in the future I need to think carefully about how delicate it will be once it is cut.

Wednesday, 17 November 2010

Screen Printing onto a Jumper


Skill
Learning how to screen print my illustrations onto clothing.

Approach to Learning
As screen printing onto clothes is not very different from printing onto pillowcases/ strip of cotton I just thought I would experiment and learn from watching others.

Key Tips from the Learning Process
(also see Screen Printing onto Pillowcases)
  1. I had to print over the jumper's seams on the shoulders and along the bottom. This meant that there was a clog up of paint after printing and sometimes it would miss a bit off. Gareth, who works in screen printing, suggested that I had paper towel ready to blot the excess and I could hand paint the missing bits.
  2. The jumpers were quite thick so they took a long time to dry. After waiting a long timeI found out from Gareth, on my course, that there were fans available to speed up the process.
  3. One of the fashion students told me that once the print was dry, if I ironed the jumper it would last longer when I wash it.
My screen with the weights on two corners making it stable preventing it from moving when I print.


Learning from my mistake with the pillowcases, I had a test run on an old t-shirt. The picture on the right shows the problem I had with seams.

Overall...
Seeing my illustration blown-up and printed on a jumper has made me feel more confident about my work. While screen- printing is messy and it can go wrong really easily, it has taught me to be less precious about my work, made me experiment more.

Screen Grab

In today's crit I learnt (amongst many other useful things) how to "screen grab" on a mac, cmd- shift-3:


Tuesday, 16 November 2010

Screen Printing onto Pillowcases


Skill
Screen printing onto cotton pillowcases

Approach to Learning
Carrying on from the refresher screen print workshop I decided to experiment with different material etc.

Key Tips from the Learning Process
  1. The images looked 'smudgy' after I printed them. I think that this was due to either the cheap cotton pillowcases so the paint bled more than expected, or, I didn't clean my screen properly. From this I learnt that I should carry out a test print on a scrap bit of material first before printing. I should also wipe down my screen properly after each use, even if its the same colour because I found out from another student that it keeps the image looking sharp.
  2. Put some newsprint in between each layer so that the paint doesn't soak through. I found this out the hard way and forgot the first time...
  3. Iron out any creases before printing so there are no glitches once the image is printed.
  4. At first I found the image smudged once printed. This was because the I should have pulled the pillowcases taught before pinning to the table and the put the pins in tighter.
  5. The image that I had on my screen was only two of the three trees. I printed the two right hand trees first and learnt that if I covered them with newsprint I could print the third straight away. This made lining them up difficult as I couldn't see them. I had to measure distances out and mark where the third had to go in pencil.


The faint, smudging around the edge of the print-


Overall...
I feel I have learnt a lot from my mistakes. Although this made the entire process twice as long, it means I am unlikely to forget and make the same mistake again.

Monday, 15 November 2010

Worm Animation

I have decided to advance the movement of the circle into an animation of a worm.

Worm 1-
By trial and error I've worked the correct movement out, but I want to move it across the page.


Worm 2-
Making the worm move across the page- I changed the opacity of the frames so I could see through them all to work out where the worm had to move to next.

Simple Circle Animation

Skill
learning about simple movement in animation.

Learning Approach
I just drew a simple shape and decided to experiment with the timings, learning by trial and error, testing different techniques out.

Key Tips from the Learning Process
  1. In the last animation I tried to make the circle come from different sides. It doesn't work however because in some of the frames the circle is too small and it makes it flicker. I need to make sure the subject is the same size in every frame.
  2. Again in the last animation, I have forgotten to remove one of the frames so half a circle flicks onto the screen while it's also moving on the other side of the screen. I should double check I am only showing the frames I want to or it can ruin the whole animation.
  3. Changing the timing on each individual frame is tedious and take time. I didn't realise until far into the last animation that you can select all frames and carry out the process only once.

1- The first animation is 16 frames repeated 4 times with a delay of 0.01 sec between each frame. It's too fast:


2- On this second animation the time delay is 0.1 second... I definitely prefer this speed:


3- Here I have managed to ping the circle backwards and forwards.


4- I've tried to make the ball appear from different directions. There is a problem with the size of the ball in a couple of the frames however which is proving impossible to sort out... I think I would have to start again if I was taking this project further.


Overall...
Although trial and error can be a laborious process I found it really good not to have any structure to learning, to be able to experiment. I allowed me to explore without worrying about making mistakes and I discovered loads of small shortcuts etc which would have been really difficult to find in a manual. However, I don't believe that it's they best way to learn all the time, but I think that there should be a balance between textbook learning (studying), and just getting stuck into the process without knowing what you are actually doing.

Friday, 12 November 2010

Inspiration for Laser Cutter

This is just a cutting I found a while ago from a magazine. When I had finished cutting my tree out of the laser cutter today, it reminded me of it.

Laser Cutter 1

This is my first go on laser cutter. I just cut the tress out on plain white paper but I still feel it is effective.


Skill
Learning how to cut out my illustrations using a laser cutter

Approach to Learning
I went to a laser cutter induction last year and thought that I would remember how to carry out the process with help from my notes. However, it proved more difficult than I thought. Luckily, Katy had had an induction in the morning and she reminded me how to set everything up. I watched Katy cut her dinosaurs out first, then I cut out my tree.

Process Notes

Key Tips from the Learning Process
  1. Time management. I did not realise how long it would take to cut my tree out. Due to all the intricate detail, it took just over 40 mins. I wanted to cut some more trees out of acrylic but I only had a 1 hour slot. I could have used this 40 mins to do something else while the tree was being cut out.
  2. Write notes on the process down in more detail. This would make it easier for the next time I want to use the laser cutter.
  3. Double check all files are compatible with the laser cutter computer. Katy told me all files have to be saved in Adobe Illustrator CS3 because the laser cutter computer isn't up to date yet. I had problems opening my files in Illustrator because it was too large. I learnt to scan the image straight into Illustrator instead of Photoshop.
    Overall...
    I found working with and from a fellow course member really easy and useful. If there where were any problems there were two of us trying to work things out- there was always someone there to help me. Although it did not happen this time, a possible problem with working with someone else is we may chat while we could be could be getting on with some other work. Overall, I feel that learning how to use the laser cutter properly is a great new skill, it suits my style of illustration. I will definitely use the laser cutter again in the future.

    Tuesday, 9 November 2010

    Screen Printing onto Cloth

    This was my first attempt at screen printing onto cloth. Before this exercise, I had only done screen printing once before, and this was onto paper.


    Skill
    Learning how to screen print my illustrations.

    Approach to Learning
    I went to a refresher screen printing workshop last week. I had already been to one but because I had not done any screen printing since, my knowledge of the process was very vague.

    Process Notes

    Key Tips from the Learning Process
    1. Time management. Screen printing is a very long process - while I was waiting for the screen to dry there would be gaps of an hour long. I found I could use the time to prepare my image ready for exposure.
    2. Remember do not expose the screen to light until image has been exposed. It did not happen to me, but another girl forgot and took hers out the room while I was there.
    3. The first image on this post is the original image printed from a computer onto acetate. I learnt that by doing this it makes the final image stronger once printed.
    4. Remember to always put weights on the screen or the print will come out blurry. (I always seemed to forget)
    5. There is almost always a member of staff who is on drop-in who can help

    Overall...
    The refresher workshop was a good way to get started, but I found the best way to learn was actually carrying out the process myself. This way I got a feel for how long and laborious screen printing is- the workshop only lasted for half an hour and made the process look simple, whereas realistically, screen printing can take all day. I am a hands- on learner.


    Sunday, 7 November 2010

    Some Photos of Trees

    I took these while at home for the week end in Cumbria.


    These photographs were taken to make me realise that I should try and take a camera out with me more often. Even if the photos taken do not make good photographs themselves, they can be used for reference for my illustrations.

    Saturday, 6 November 2010

    Pierluigi Riccio


    Continuing with the theme of trees, I would like to take some photographs for this project. I have not taken a camera out in a while and think I would be good practice to start doing so- it is a good, quick way to document and capture an idea.

    Wednesday, 3 November 2010

    Bird in Animated gif

    Skill
    Creating an animated gif in Adobe Photoshop

    Approach to Learning
    I researched 'animated gif in Photoshop' on the internet and taught myself by following the steps from http://creativetechs.com/tipsblog/build-animated-gifs-in-photoshop/.

    Process Notes

    Key Tips from the Learning Process
    1. I found that sometimes I got muddled up with the different layers and the order they were meant to be in. In the future I need to remember toname/label the different layers according to the correct order.
    2. At first, my animated gif was too fast and I found out that the preview in Photoshop is not very accurate. I learnt to save and export my gif then watch it in quicktime player to get a feel for timings. Then I would go back and edit.
    3. Alos, my first attempt was too short. I had to repeat the 9 frames 5 times so there were 45 frames in total.
    4. When i tried to upload my gif onto my blog it wouldn't work. Through trial and error I learnt that the gif needed to be saved as an MPEG- 4 file

    Animation 1-
    Too fast and too short


    Animation 2-
    Slower, but still too short


    Final Animation-


    Overall...
    Learning from a step-by-step guide was simple and quick, making me realise how easy it was to put together an animated gif. If i had known how to do it sooner I think I would have used it a lot more in the past, I will certainly use it in the future. The demonstration I found was really good, however, similarly to learning from books, if i had trouble with something I would have been stuck and had to wait to go into college to get help.

    Reading Week

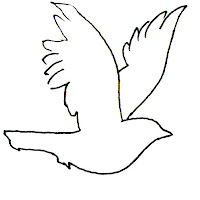
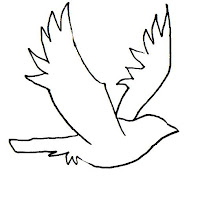
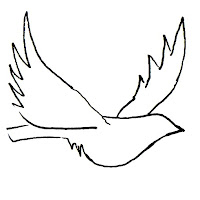
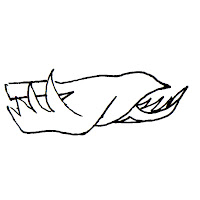
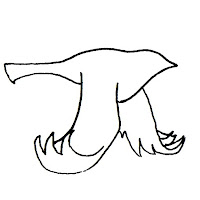
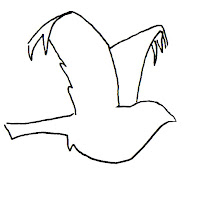
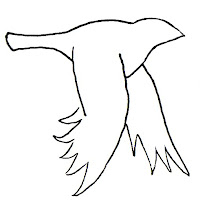
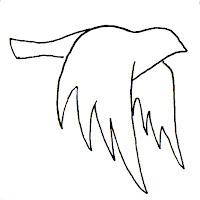
    In 'Animation: A Handy Guide' I found a section explaining about bone structure in animation particularly interesting and decided to give it a go. It turned out to be very useful. All 9 images can be put in a loop in an animation to make it look like it's flying. When I get back to college I will put it into flash/ make an animated gif.


    Skill
    I want to learn how to use illustration to make an Animation. How to create realistic movement in a an animation.

    Approach to Learning
    I borrowed a few books from the library and read up on some animation techniques, taking notes as I went along. Then I drew the sequence to test out the suggested technique.

    Key Tips from the Learning Process
    1. Make thorough, step by step notes so I can work without the book in the future.
    2. Mark important pages so when I want to go back and try out a particular technique I can easily find it. I did not do this I wasted time trying to find information again.
    3. When I draw out an image to animate I need to make sure I can see the previous image so the animation will line up properly. I thought I would be able to work out the size if the area I was drawing onto was the same size, but i found out that there is still a risk that the images will not synchronise.
    4. Make sure the general shape of the image is similar to the others being put into the animation
    Overall...
    Teaching myself animation techniques from books meant I could learn/ work at my own pace ensuring that I understood everything as I went along. If I felt I did not understand something I could go back and re- read. However, I did have to be self disciplined. With no-one overlooking what I was doing I could have been easily been distracted. I felt I managed to keep on track though. Another downside was that if I did not understand something after re-reading I was on my own. I would have to wait until I went into college to ask someone. Overall, I found working from books a very successful way of learning.